 |
| After refacing. |
When filling up all my newly refaced drawers I took care to maintain a comfortable level of organization that would enhance function yet not force rigid guidelines on precisely where items must be put back. Let’s face it, sometimes we just dump things in drawers. Even you.
The two deep bottom drawers mainly store bulky and less used items like stationary, old label makers and extra boxes of safety pins, tape, and the like. They stay fairly organized on their own and are comfortably sitting this round out.
The three shallow drawers on top are used constantly because they hold the writing instruments, scissors, tape, rulers, sticky notes, and etcetera. Now that the supply drawers live in a shared space (i.e. not my own separate office) my husband uses it almost as often as I do and
Most used of all five drawers is the top one. I wish I took a “before” photo but surely you can picture a 10x12 inch drawer filled with a mixture of pens, pencils, markers, and miscellaneous writing utensils. The thing is, it’s always been that way; any attempted organization eventually failed, reverting it back to a single dumping drawer. Though not ideal, it worked. But when I began dumping them in this time, after fixing it up, I stopped and said, “No, there must be a better way.”
Those who know me are aware of my obsession making and using organizers out of old boxes. (I’m actually in the middle of yet another said project). Sometimes I fear this may lean towards the hoarding spectrum. At any time you can visit and see a couple small groupings of small and medium-sized empty boxes, but at the same time you can also see where and how I've used them in practical manners. Here is one of those stories…
 |
| Stay hydrated. |
I began with a large, clean work surface; the empty drawer, freshly cleaned and refurbished; and all the needed supplies for the project. The boxes I used came with a popular Scotch and are made of a great cardboard that is quite sturdy for its relative thinness with a smooth, white interior.
 |
| Length. |
 |
| Depth. |
Using a ruler that is exactly 12 inches (30.48cm) end-to-end I measured the length of the drawer. The ruler actually fit at exactly that length at the shortest part so if I made the drawer dividers 30cm long they would fit at any point across the drawer comfortably. The drawer height is 8.5 cm so I decided on 7cm for the divider height so it would be deep enough to hold a lot but not tall enough to impede opening the drawer (obviously).
 |
| Please be very careful using your cutting instrument of choice. |
The original box is 33.5cm x 9-9.5cm (the sides have small size discrepancies common for mass-produced consumer product boxes) so I needed to trim it down. Using the side with the longest end as the bottom of the divider (in this case, the side with the lid flap) I measured 7cm up from there on both sides. I cut the small lid flaps off because they are not needed and just get in the way. Then using a very sharp box cutter I very carefully cut along the 7cm marked line all the way around. The excess just cut off is not needed in this project, I put it into recycling.
 |
| Snipping the bottom edge to make the flaps. |
 |
| A confusing photo for a confusing step. |
 |
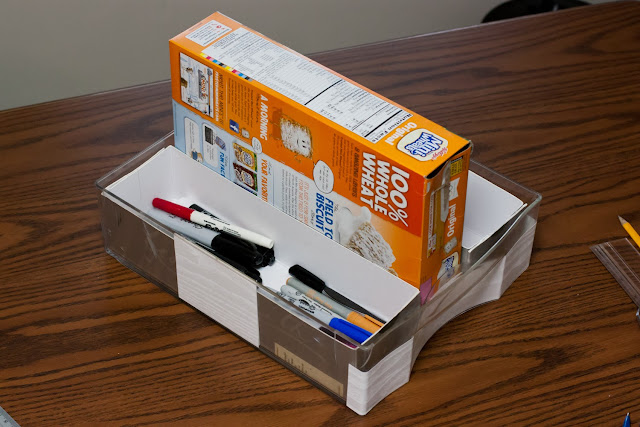
When I started sorting the markers and pens into their new dividers I didn't like how items looked or felt in the middle space. I worried that smaller objects may slide under the boxes and decided to make another, smaller box, to put in the middle. Of course.
 |
| Oh, she's at it again. |
Often when my husband finishes a box of cereal he will thoughtfully leave the empty box at the bottom of the pantry, next to the paper recycling, in case I want to use it. So when I opened the pantry door that afternoon an empty box awaited me. Destiny, it was, when I tested the size of the box and it fit absolutely perfect in that empty space. I was so excited; it took me only a couple minutes to measure, cut, and tape the box for the middle as well as a slightly smaller one to put inside. I was giddy at this point and couldn't wait to begin filling them.
 |
| Markers, pencils and miscellaneous, and pens. |
The resulting drawer organizers are exactly what I wanted. If the outside designs on the boxes bother me I can easily trim them down more or cover them with white paper to unify the look. I’ll wait and see.
 |
| Top drawer. |
To satisfy your curiosity, the second drawer holds scissors, rulers, tapes, and few other things. In the center is a clear divider cut from a large Q-Tip box.
 |
| Second drawer. |
The third drawer utilizes some plastic dividers I found at a thrift store many years ago and contain various things that don’t categorize well.
 |
| Third drawer. |
Sharing this project seems a bit personal, as if you are pilfering through my drawers and fingering my eclectic mixture of pens (which all work well, by the way). At least you know who you can always borrow a pen from though.
No comments:
Post a Comment